Planner Dashboards available in various sizes

Planner Dashboards available in various sizes
Visit my Etsy Shop

Tuesday 27 August 2013

My take on Carol Quance paperartsy project - Cog box


I look at all the projects and creations over on Paperartsy's blog and am envious every time. 
But as Leandre says, its about how it inspires YOU to create something so today, as I've been home all day feeling sorry for myself, I decided to use a small pine box that has been gathering dust on a shelf unloved for months and months and months. 

I used some Reeves Course texture medium through a stencil on the lid and left it to dry.
Then painted the entire box with "Vanilla" acrylic paint from Papermania.
I then put a thick layer of Tim Holtz clear Rock Candy Distress crackle paint across the top and randomly around the sides. Again, I left it to dry. 


Once it was all dry, I painted over the whole surface again with "antique gold" acrylic paint by papermania.
Then lightly sanded the surface back to roughen up the sides. 


The inside and roof of the box were covered in old book papers and as I had some paint left on my glass mat, I watered it down and painted over the paper layer once it was dry. 

I used my visible image "broken" stamp around the edges and used the vanilla paint. 
I dry brushed some of the metallic paint around the edges. 


All the MDF cogs were bought at the recent Steampunk Rally in Cambridge. These were all classed as "seconds" and I got a massive bag for £1. I painted them all with Gold metallic paint from the kids section at Tesco's. I love the effect it has. 

Finally, I used a dry brush to highlight with "Treasured Copper" and added a antique bronze butterfly necklace that I had made a while ago. 


Hope you like it and thank you for stopping by my blog today x 

post signature

Monday 19 August 2013

Mish Mash MDF Door hanger


Been 'playing' again and going off on a tangent.
The vast majority of the prep work was done last night so today its been a case of assembling.

The MDF door hanger is available from Dreamees  and I've had them sitting on my shelf for a while now so something had to be done :-) 

I ripped up a few pages from an old romantic novel book that I saved from the scrapheap. I applied them with plain old PVA glue and left it to dry. (did this bit in the afternoon) 

I applied a watered down layer of brushed corduroy distress ink and dried it off. Then added alcohol inks over the top and finished with metallic copper alcohol ink (copper is one of my favourite metallic colours).

I next used some coarse texture gel through a mask in one corner and applied copper glitter before it dried. 

In the meantime, I die cut some Tim Holtz tattered edge flowers and made up some roses,  butterflies & a leaf from Martha Stewart Air dry clay and left it to dry. 

So this morning, I painted the clay and assembled the rest as I wished. 
Found a couple of gold tone buttons in my box and cut the shanks off (look at me with technical words lol). 

Its all a bit of a mish mash, but hey, galloping horses ain't gonna stop to inspect it and its my creation.

Thank you for stopping by my blog today x 

post signature

Sunday 18 August 2013

Home made 'gelli' plate results - 1st time user & my thoughts


Recently I made my own DIY Gelli plate as I was intrigued to see what all the fuss was about.
I bought the gelatin from Tesco's and at the 2nd attempt got the recipe right. The first time it was right but I didn't line the glass tray I used with cling film so it all stuck to the dish. Anyway, the packets of gelatin I used came with 6 individual sachets in it. I used 3 sachets. Add the 3 sachets of gelatin to 1 cup (an american measuring device is handy here) of cold water and stir thoroughly. Mix in 1 cup of boiling water. Mix thoroughly then pour into a baking tray or pyrex type square dish of your choice. So long as the solution is about 1/2" depth you should be okay. Leave it to cool and then once its start to solidify, pop it in the fridge to completely  set. Once it has set. DON'T DO WHAT I DID, & cover it with the cling film - naturally, it leaves a slight impression and this is what you DON'T want - d'oh.

Anyway, there you have it, your own gelli plate. I appreciate its not suitable for vegetarians because of the gelatin. 

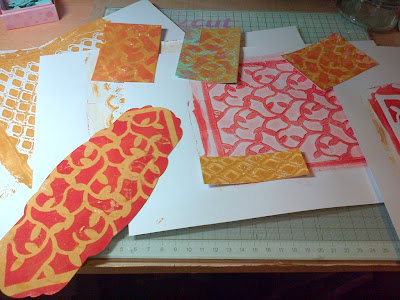
Having got the paints out and the brayer and got the paper / card stock ready and the masks out, I set about mono-printing. Having finished mono-printing, I am left with the question... What??? I just don't get it. 

Sorry guys, for all those dedicated gelliplate-ists, its just not for me. I am glad it only cost me the price of a packet of gelatin to find out though and not the cost of a gelli plate.

I've put it back in the fridge for now and I am get it out again this week, but don't hold your breathe.

Thanks for stopping by my blog today x 


post signature

Xmas snowflake tag


Today I have felt like screaming - for no reason whatsoever.
I couldn't get on with the wedding card that I had started last night for a commission, so this morning I literally binned it and had to start again. I am now waiting for the 'ampersand symbol' to dry then I complete the card. 

SO, what did I do, seeing as the sun is shining quite nicely right now? I did a Christmas snowflake tag after watching a YouTube video by Sheena Douglas. 

The photo hasn't come out too well but it's ok - you get the gist. 

I used a basic parcel tag - not even a proper 'craft kraft' one.

Swirled some Distress Inks over it then using some Pearlex re-inkers dabbed over it using a sponge. I am liking these re-inkers a lot as they have mica in to make them sparkly. 

The snow flake set of stamps is from Wild Rose Studio and I inked up with perfect medium and used a couple of embossing powders from my box, a papermania one I think and one from Patsy May. 

To finish, I took a scrap of crafters companion parchment paper and stamped the sentiment on then using the same ink pad colours as before and the sponge, dotted over the top to tone it down.

Its not the best craft project in the world, but took me away into my own world for a while

Thank you for stopping by my blog today x


post signature

Thursday 15 August 2013

Butterfly guilded birthday card


Well where do I start with the recipe for this one? 

Before I do though, I have to thank all my friends on Twitter with their help & advice cos sometimes, you just need a second opinion and where else to get it quickly than Twitter xx

So, the recipe ....................

I started with a blank 6 x 6 hammered card. Using an inkylicious dusting brush, I swirled Peacock Distress ink all over the front of the card. Then using a butterfly mask from Ali Reeve, I inked over again with Broken China Distress ink. Then I sprayed the mask with water and lay it face down on the card front and gentle tapped it. Removed the mask and patted the surface with paper towel. 

I ran the front of the card through the Big Shot with a peacock embossing folder to give it some texture. 
Then I started with the gilding waxes - 1st layer was Creative Expressions Enchanted Gold. Followed by Creative Expressions Cast Bronze. These 2 layers themselves gave depth to the card but it wasn't enough. So I then went over with Paper Artsy Treasured Copper - left it to dry for a few minutes, then buffed it with a cloth and it came up a treat. 

The butterflies were made from Martha Stewart paper clay using one of the moulds. Its a lovely texture to work with. I coloured then with Treasured Copper gilding wax.

This is where twitter came in, I felt it needed something more so with the help of my lovely friends, we decided that the butterflies needed grounding with the addition of some trails so I went off for a rummage in my drawers to find a black sakura glitter pen. Then I discovered that I don't have one. So I used sakura black metallic and then once it was dry, went over the 'trails' with sakura clear star pen. It shows up more sparkly in real life than it does on the photo. 

A second rummage in my ribbon drawers produced 1 short piece of mink ribbon that had come from a top I had bought and more by luck than judgement, it fitted perfectly - just what the card needed to finish it off.

Thank you all for the help - you know who you are xx


post signature


Tuesday 13 August 2013

3 cards made in past couple of days


This top card was for my friends nephew. I used a robot set of stamps that I have had for a while and they have always served me well when it comes to cards for little boys. I grabbed a pile of inkpads and the various stamps from the set and created the background, building up each layer as I went along. The 3 toppers were created simply by stamping a robot onto a piece of card and using the same inkpad to soften the edges of the topper. Then simply layered on top. 


The next 2 cards were made using a combination of digistamps by Dreamees and Serif Craft Artist Pro 2. Apart from the topper being raised on foam tape, the rest of the card is completely flat & smooth. The cupcakes were coloured with Promarkers and the top bunch of flowers were coloured with H2O's (yes, I dug them out of the drawer, blew the dust off them and used them). The swirls and the pearls have just been finished off by a little dash of sakura clear star glitter (one of my desert island products)

Hope you like them and thank you for stopping by my blog today x 

post signature