Planner Dashboards available in various sizes

Planner Dashboards available in various sizes
Visit my Etsy Shop

Monday 27 May 2013

"Silence" hanger


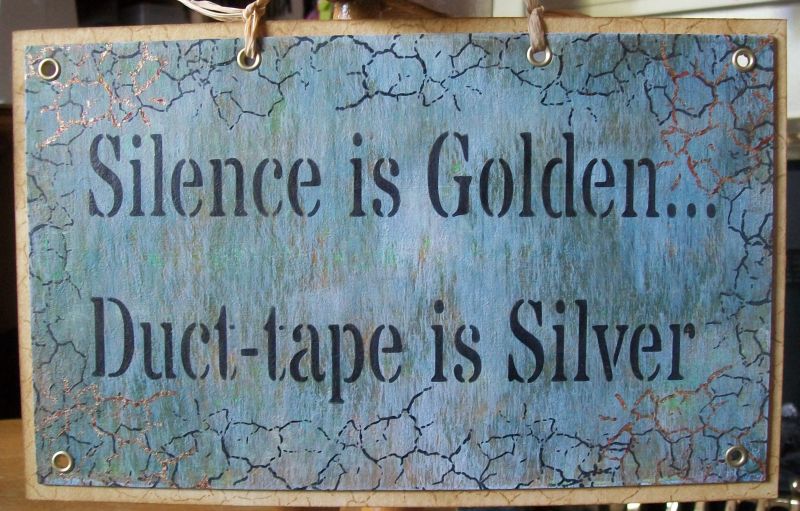
made this today as a gift for someone.

I painted a piece of hardboard with gesso, let it dry and then put some blobs of paparmania acrylic paint & Tesco Metallic kids paint on and scraped them over the gesso with a thin piece of plastic. I then used a fresh baby wipe and dipped it into some papermania cream paint  and wiped it all over the top of the previous layer. 

Once it had all dried, I stencil the sentiment using Black Soot Distress Ink.

I used a stamp from Sheena Douglas's Ageing Beautifully set around the edge. First with black soot distress ink, then with flitter glue in the corners and added guilding flakes.

I mounted the sheet onto mountboard that I had inked with distress ink. I secured it with eyelets and added 2 more for hanging purposes. 

I am thankful to Darcy Wilkinson over at PaperArtsy  for the inspiration for my piece and I'd like to enter it into the challenge 

Hope you like it and thank you for dropping by my bit of the internet today

Cazz xx

Simple 'home' card


A 2nd 'home' card for today. I am liking the clean lines in these cards.
I love my vintage distressed styles, don't get me wrong, but every now & then its good to get out of the normal way of thinking and do something different. 

New Home Card - maybe, whatever, who knows ......................


As with all us crafters, I have a bag full of scraps. Yesterday, if you scroll back through my blog, you'll notice I was working on a stencilled apron and subsequently had loads of little rectangles left over. I made a few of the 'clean & sleek' cards with some of them and last before I went off to bed, I spritzed the remaining rectangles with different colours and left them to dry over night. Today, I used just 1 for this card and layered in onto a scrap piece of mirri card. The idea being to have a piece of "art" on the wall of the "home" card. 


I had an odd piece of embossed card stock from a previous project (last week, month year... again, who knows). I rubbed over it carefully with distress ink then painted in the debossed leaves. I cut a square of card 10cm x 10cm and attached the embossed piece to this. I then attached a stirrer from any take away establishment. Then came the cutting out of the vase, stem and flowers from yet more scraps of card.


The die set used throughout is by Sizzix and is simply called 'flower vases'. The set consists of 5 vases, 5 stems and 7 flower heads. I cut the vase first and whilst it was still in the die came in from one edge only with distress ink. The over stamped it with one of Sheena Douglas's Ageing beautifully stamps

Attached the vase to the bottom of the topper with glue gel, popped the stem in and attached the flowers. A few gems were added to embellish the flowers. Then a butterfly just cos I could. 

And there you have it, a really pretty card from nothing more than leftovers.

Hope you like it and thank you for stopping by my bit of the internet today


Cazz xx

Sunday 26 May 2013

Some more clean & sleek cards


Waste not want not as they say. To see how these cards came about, look at my previous post :-) 

clean & sleek card


Earlier today, I cut out a stencil design and was left with a little pile of these little rectangles.
So as not to waste them, I lay them into my craft mat and sprayed them with various
ink sprays and left them to dry. I then edged them with Metallic Blue Marker from Letraset. Then I simply drew 3 lines with the metallic pen across a card blank and laid 4 of the rectangles over the lines.

The rubber stamp if from Papermania.

I like the effect - clean & sleek 

Pimped my cameo


After creating the pen storage box last week, I decided, after spending a while on Pinterest last night, to Pimp my Cameo. I also wanted to tackle the vinyl again as my first attempt was rubbish. But try, try and try again as they say so I did, did and did again. 

The 'create' word svg file can be found on Pinterest. It cut like a dream. was a nightmare transferring it as I don't have any transfer paper but I sprayed some stick & spray re positionable onto some used freezer paper and it sort of worked. I just had to wash over it with some sticky stuff remover. BUT it don't look too shabby. As I like butterflies too, I cut a couple from silver mirri card and dabbed some alcohol inks over them before attaching onto the lid of the cameo. 

Thank you for stopping by my little bit of the creative world today x

'Time' birthday card for the worst time keeper


The recipient will most certainly see the irony in this card :-)

So, the ingredients - where do I start, there are so many.
I am not one for sticking to one companies products and I mix & match on a constant regular basis. 

To start with I used Ali Reeve's Stamp & colour card and inked over with various shades of brown distress inks. Then I used a clock mask and lay it over the card and misted with water. Lifted the mask then rolled over kitchen towel to reveal the masked design. 

I then used Sheena's 'ageing beautifully' stamp set to create the cracked edges, the splats and the distressed corners. What a great set of stamps these are. 

The clock itself was cut on the silhouette cameo from a file that you can get from this site 
free svg blog    Can I urge you to go for the zipped file, there are 250 + images on it (I am not associated in anyway with the lady, just a very happy recipient of the files and there are some fab designs on the site)

I used the white silhouette marker pen to do the sentiment and the shape of the label before cutting it out.

The verse was sourced on the internet and credit given to the author, Nate Hawk. I printed this onto safmat and rubbed it down onto the front of the card. 

I then matted & layered with gold mirri card from Create & Craft.

Now, when I mat & layer with Mirri card, I am conscious of the price of a sheet of mirri card and also the wastage. If am matting underneath a layer of paperstock, then I DON'T gut the mirri card, but, as in this case, if I layering card stock over the top then I DO gut the card.

I simply turn the card over, draw 2cm round each edge with a ruler & pencil and cut it out - simples. 

You get so much more mileage for your mirri then.

Of course, it is entirely up to you how you do this or even, if you do this at all.
The rules aren't set in stone

Thank you for stopping by my blog today

Cazz xx

Thursday 23 May 2013

Vintage Birthday Card


Images from this card are from Jems Designs "Gentlemens" CD.
I printed the topper 3 times and used the 2nd & 3rd toppers for the decoupage.
The circles were created using frayed burlap distress ink pad and a lid from a miniature jam jar (like the one's they have in hotels)


Thank you for stopping by my blog today 

Cazz xx 

Wednesday 22 May 2013

Wedding Anniversary Card


By the time this post shows up, my best mate and her husband should have got their post so I can now tell everyone that this is the card I made for Jax & Andrews anniversary.

I used the spellbinder entwined heart d-lite die to cut an aperture into the centre of a square of black card. The added a square of gilded card behind it. I had planned on putting some gilded corners onto the card but that didn't work out so instead I went to Plan B and inked up a flourish stamp with flitter glue and gilded the corner of the card and also the corner of the white card blank. 

The backing paper was created in Serif Craft Artist Professional 2.

Hope you like it and thank you for stopping by my blog today

Cazz xx

Sunday 19 May 2013

"Edgar" Birthday Card

This card is for my own son who turns 31 on the 24th. 

"Edgar" is coloured with Promarkers - various shades of grey's.

The stamp sets are available from Visible Image 

The cog dies are papermania and gilded with gilding flakes from Indigoblu, attached with papermania brads to finish off.

Jute is from Lidls :-)


Hope you like it and thank you for stopping by my blog today.

Monday 13 May 2013

Wedding Card

 Here's a wedding card for a commission order. The client had seen a previous card with the lattice on and had asked for that to be used on this card. I have kept the design clean and simple - Less is more as they say.
This is my first time using Creative Expressions Silky Crush ribbon and the dazzlers. I doubt it will be the last. They are just stunning.


Thank you for stopping by my blog today

Cazz x

Thursday 9 May 2013

Teenage girl birthday card


Here is a card for a teenage girl.

I have used the Frederika CD and one of the precoloured images.
This cd is available from Polkadoodles 

The backing papers are from the matching paper pad

And its got TICKETS, I like tickets :-)

Thank you for looking and stopping by my blog today

Cazz xx 

95th Birthday card


Here is a card for a lovely lady who is 95th tomorrow (10th May).

I used the Spellbinders Lattice die that is available from Craftsite 
The butterflies are marianne dies as are the leaves

The topper was created on the silhouette cameo and I went over the top with a sakura silver star pen.

The background was stencilled with the waste from the leaf die using dusty concorde distress ink pad


Hope you like it and thank you for dropping by my blog today


Cazz xx